
The App allows you to view stereoscopic images and “move” in them. You can also take pictures with a wizard and, once you’ve uploaded separate photos, you can save them in stereo mode.
Charging multiple stereoscopic pictures automatically activate the slideshow mode that shows the images in succession with the lapse set in the options.
If you have a Bluetooth gamepad available, you can zoom in and calibrate the distance between the eyes directly in the display mode.
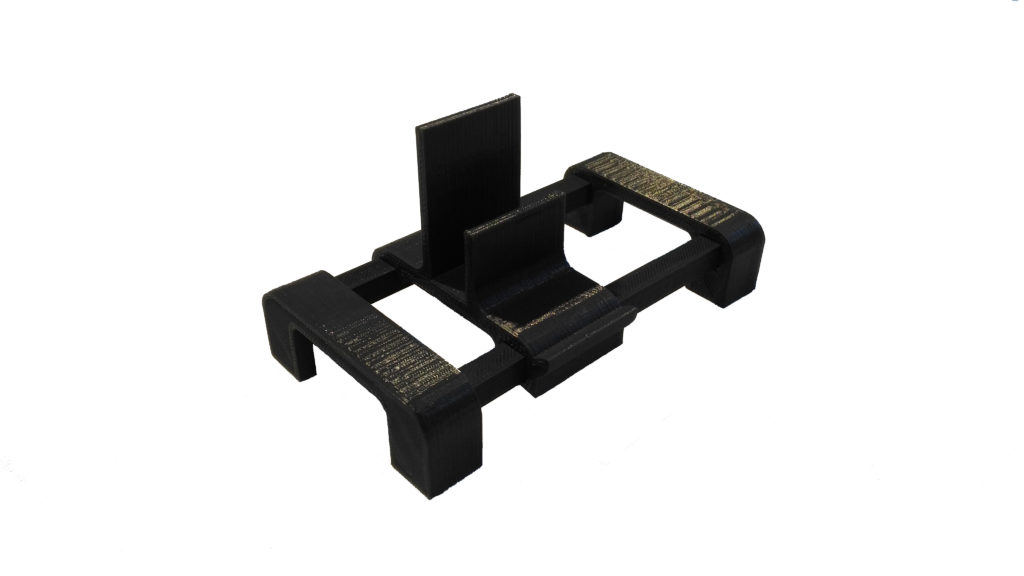
After all the instructions you can find the link to the page for printing carriage.
Instructions
Main view
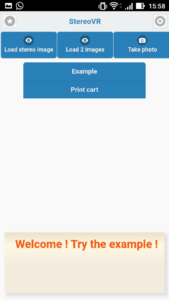
From this view you can decide what type of image you want to load, if you want to create a new stereo picture, if you want to try the preloaded demonstration image, go to the panel that shows some settings (top right gear) or view these instructions (print cart).
The two buttons above (Load Stereo and Upload 2 Images) relate instead to loading the image from your photo library on the device. ‘Load stereo image’ allows you to load a stereoscopic image, that is, a single image that includes both the right eye and the left eye view. Optionally you can decide to reverse the images by crossing them (default reverse). With ‘Load 2 Images’, the user must manually select the images for the left eye and the right eye, paying attention to selecting the right ones.
The Example button allows you to see a preloaded image if you do not have your own pictures.
Take a stereoscopic shot
By choosing the ‘Take Photos’ button you can follow a procedure to take pictures and then view them. You can then record the resulting stereo picture from the ‘Display menu’.
Available options

Zoom to reduce or enlarge the image.
Horizontal motion velocity expressed in pixels.
Vertical motion velocity expressed in pixels.
How many seconds an image must be displayed in slideshow mode.
Vertical display zero point.
Interpupillary distance expressed in pixels.
Display View
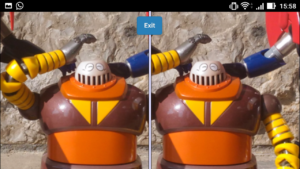
This is the view where the two images are displayed. To have stereoscopic view you need to have a head-mounted VR like the one shown on wikipedia.
Turning your head to the right, left, top and bottom, you can explore the image.
Exiting the image horizontally to the right or left, you can recalibrate the image’s reference position.
By pressing the center button you can exit the view and enter the ‘Display menu’.
The slideshow mode shows the number of photos uploaded and the current photo.
If you have a Bluetooth controller connected, pressing forward the stick you zoom in, pressing back zoom out, to the left approaching the pupillary distance and right goes away.
Notes on the recording format
Photos taken with StereoVR are saved in PNG format to a definition of 4096×1152 pixel and the images are paired and crossed.
They can then be viewed with any graphics program and uploadable to any social service such as Instagram and Facebook.
Of course the pictures can be reduced and converted to jpg
Is there a format called MPO (Multi Picture Object) supported by manufacturers for cameras that take pictures of 3D natively. This format is not supported by StereoVR, but there are online converters to convert an MPO file to JPEG. Once having obtained the 2 images, it is possible to reassemble them with StereoVR to publish for example on Instagram.
If you want more information about the MPO you can read here.
Do not have a 3D viewer and want to see the same in 3D?
There is a simple trick that consists in crossing eyes staring at the picture. Doing some effort you will find that between the two images it is forming a third image which is in 3D. To facilitate focus, you can zoom in and out of the picture.
Link to Stereoscopic Sample Images
Go to the cart page with the files to download.
For any questions or suggestions you can contact us from the page of our website.
Text translated with Google services